Press “Ctrl+V” (Win) / “Command+V” (Mac) to paste the channel into the new layer.
This will add a new blank layer above your Background layer. With the new layer selected, press Ctrl+V (Win) / Command+V (Mac) to paste the channel onto the new layer:
Click the “New Layer” icon at the bottom of the Layers palette.
Switch back to your Layers palette and click on the New Layer icon at the bottom:
Step 2: Paste The Channel As A New Layer
Click on the RGB composite channel to turn all the channels back on. Your image will now appear in full color once again in the Document Window.
Once you’ve chosen the channel to use, press Ctrl+A (Win) / Command+A (Mac) to select it, then press Ctrl+C (Win) / Command+C (Mac) to copy it.
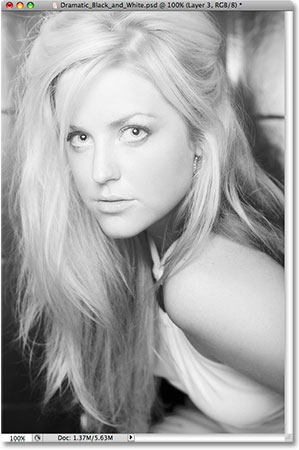
Click on each of the Red, Green and Blue channels to select them individually. When you click on one, you’ll turn the others off, and all you’ll see in your document window is a black and white version of the image. Each of the three channels will have a different black and white version, so look at all three of them and pick the one that looks best. In my case, the Green channel looks best, so I’m going to use that one.
Photoshop’s “Channels” palette showing the Red, Green and Blue channels, plus the composite RGB at the top.
The first thing we’re going to do is inspect our three Color Channels to see which one contains the highest quality image with the greatest amount of contrast. We’re going to use it as our black and white version. To do that, switch to the Channels palette (it’s grouped in beside the Layers palette). You’ll see three channels named “Red”, “Green” and “Blue” (you’ll also see a fourth one, “RGB” at the top, but it’s just the composite of the Red, Green and Blue channels):
Step 1: Find The Channel That Has The Best Tonal Range
And here’s the more “dramatic” black & white version we’ll be creating in this tutorial, bringing much more emphasis to her face and hair:
Desaturating an image removes the colors but usually creates lifeless black and whites.
Here’s how the black & white version would look if I simply desaturate it. Not really all that interesting:
The original full color image.
Here’s the original photo I’ll be using:
Learning Photoshop has never been easier!
In this Photoshop tutorial, we’re going to learn how to create more interesting black & white versions of images by using focused, dramatic lighting to bring attention to the main subject.
Dramatic Black & White Effect in Photoshop
Dramatic Black And White Effect In Photoshop
Комментариев нет:
Отправить комментарий